
How to Add Nido Marketing to your Facebook Ad Account and Business Page
In order to grant our agency access to your Facebook account, you will first need to sign into your Facebook Business Manager here: business.facebook.com.
If you do not already have a Business Manager account, you’ll need to create one. Here's a quick guide on how to Create a Business Account in Meta Business Manager.
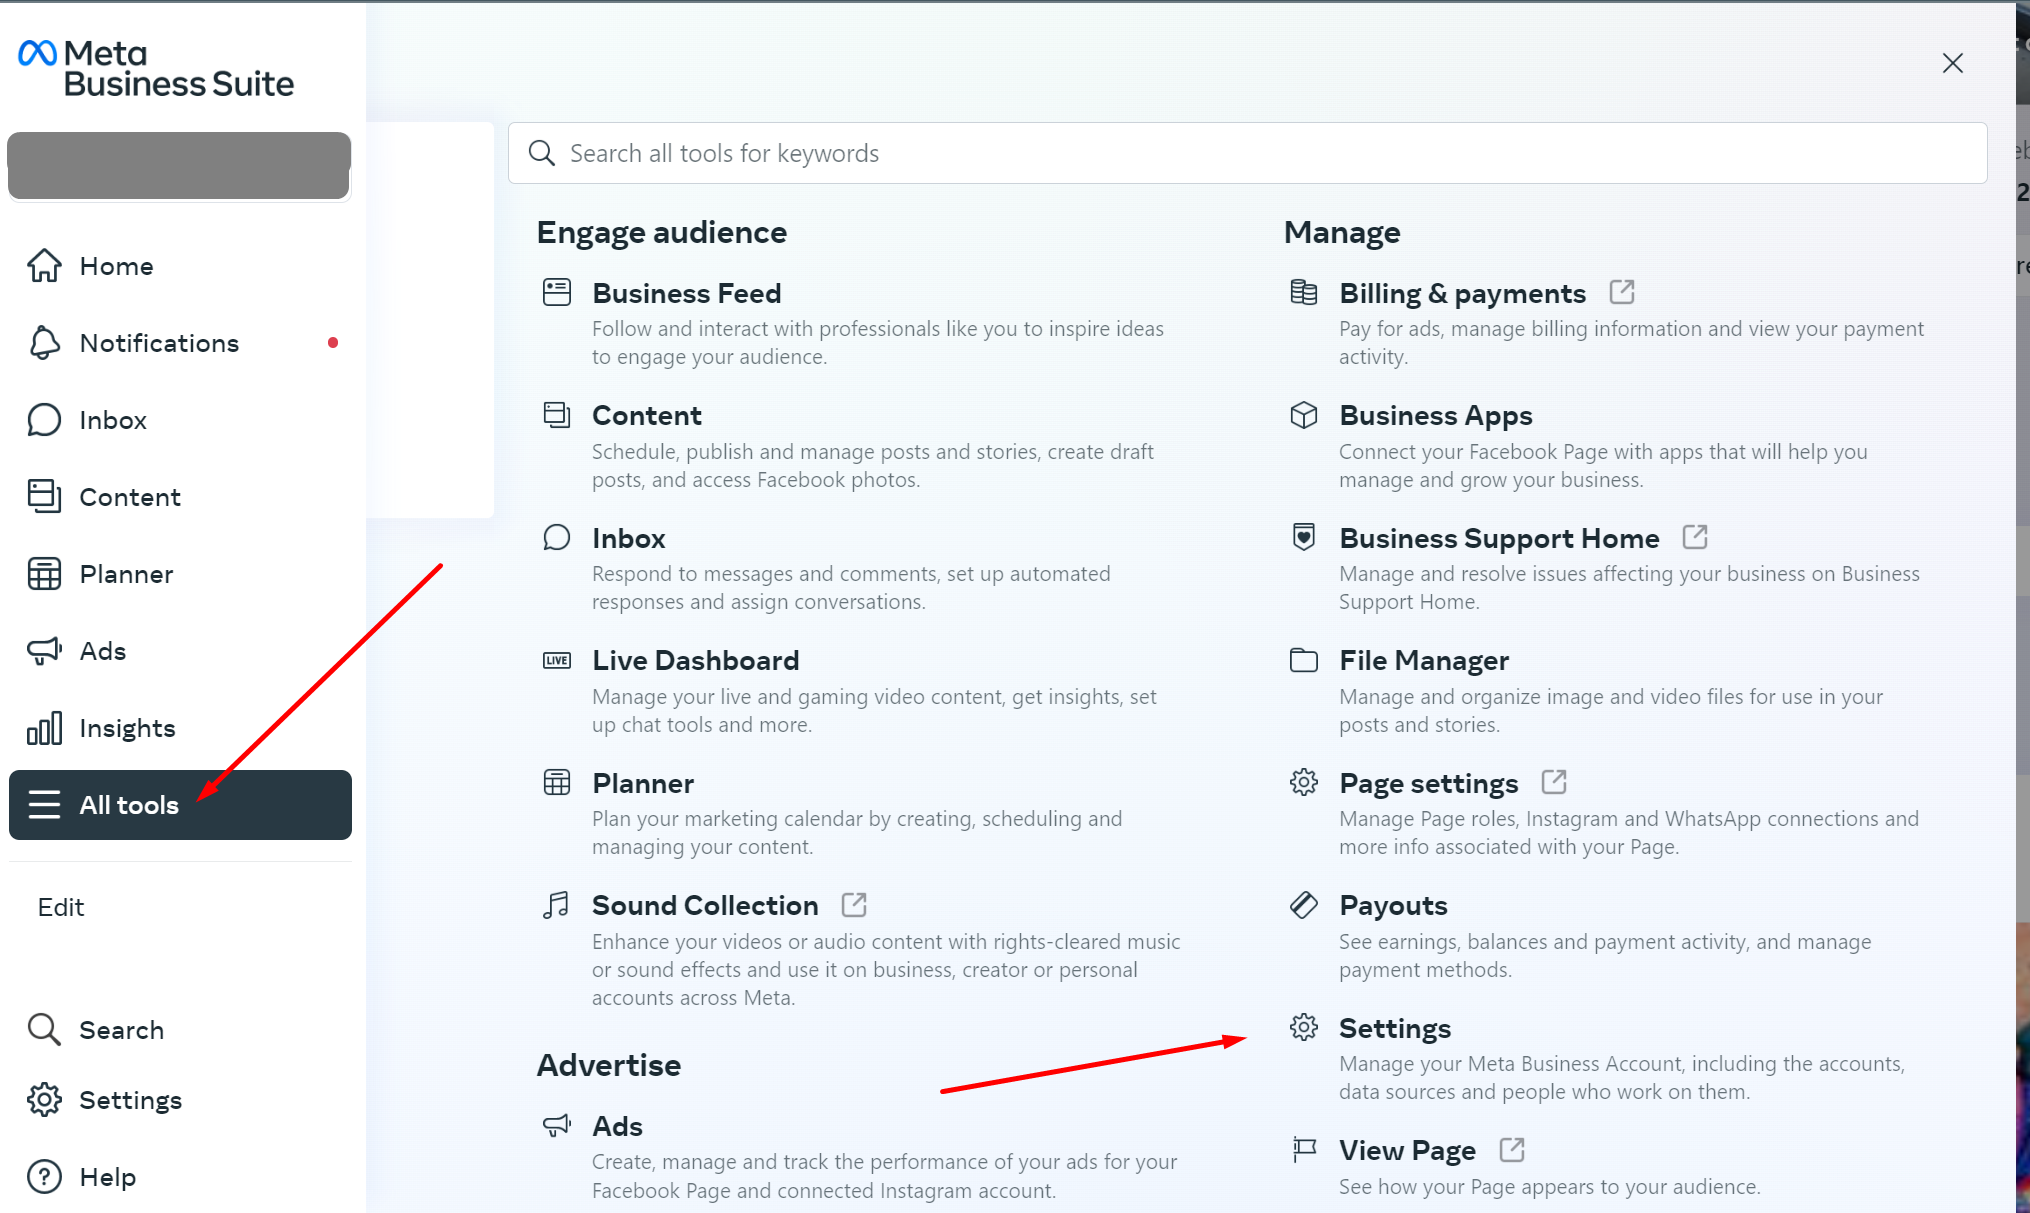
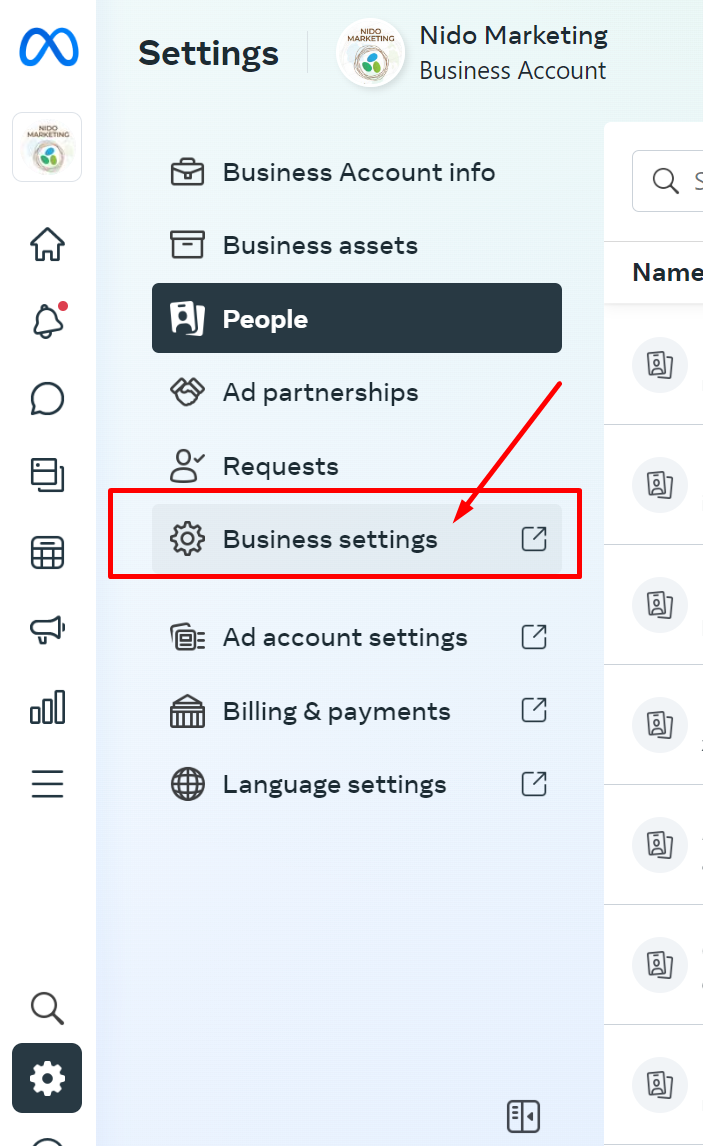
Once you are signed in, please navigate to the "Business Settings" page:
Business Manager > All Tools > Settings > Business Settings.
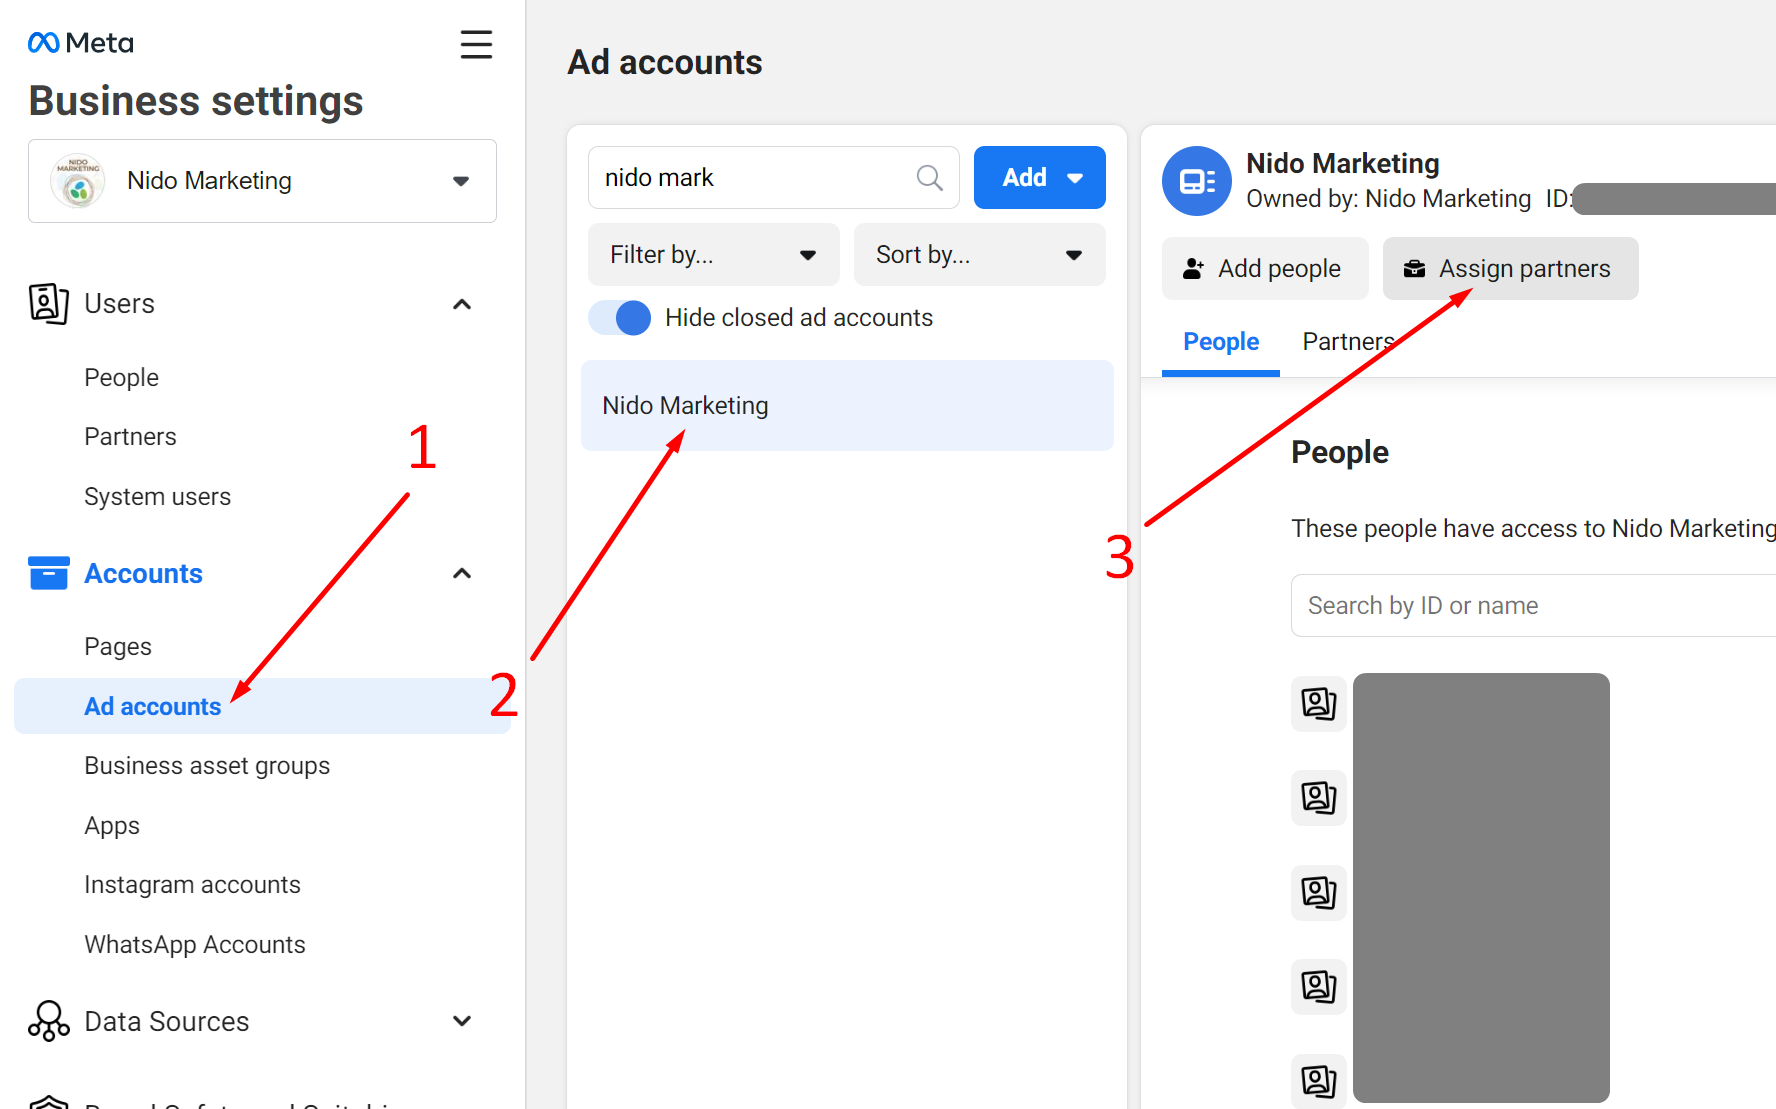
Please select the "Ad Accounts" tab from the vertical list on the left and then choose the Ad Account name that coincides with your business. On the right-hand side, you will see a button that says “Assign Partners"
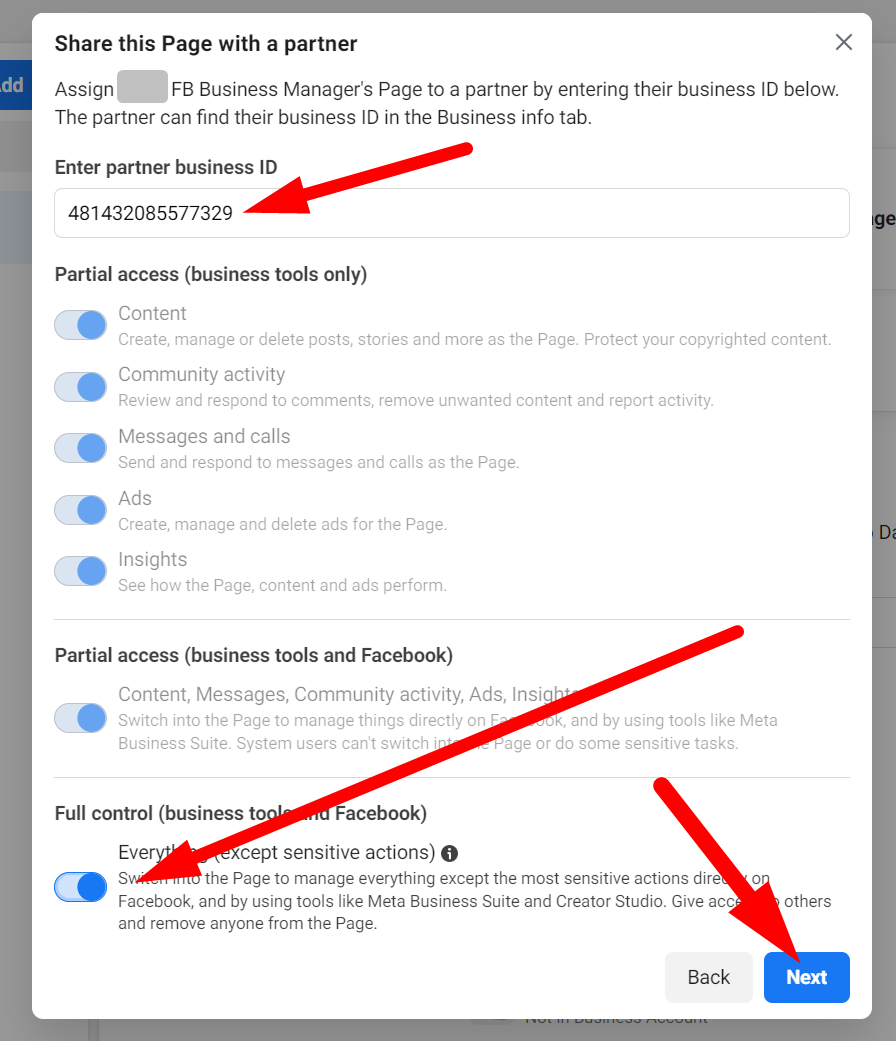
A form should appear with the title: Assign Partner. Please click "Business ID".
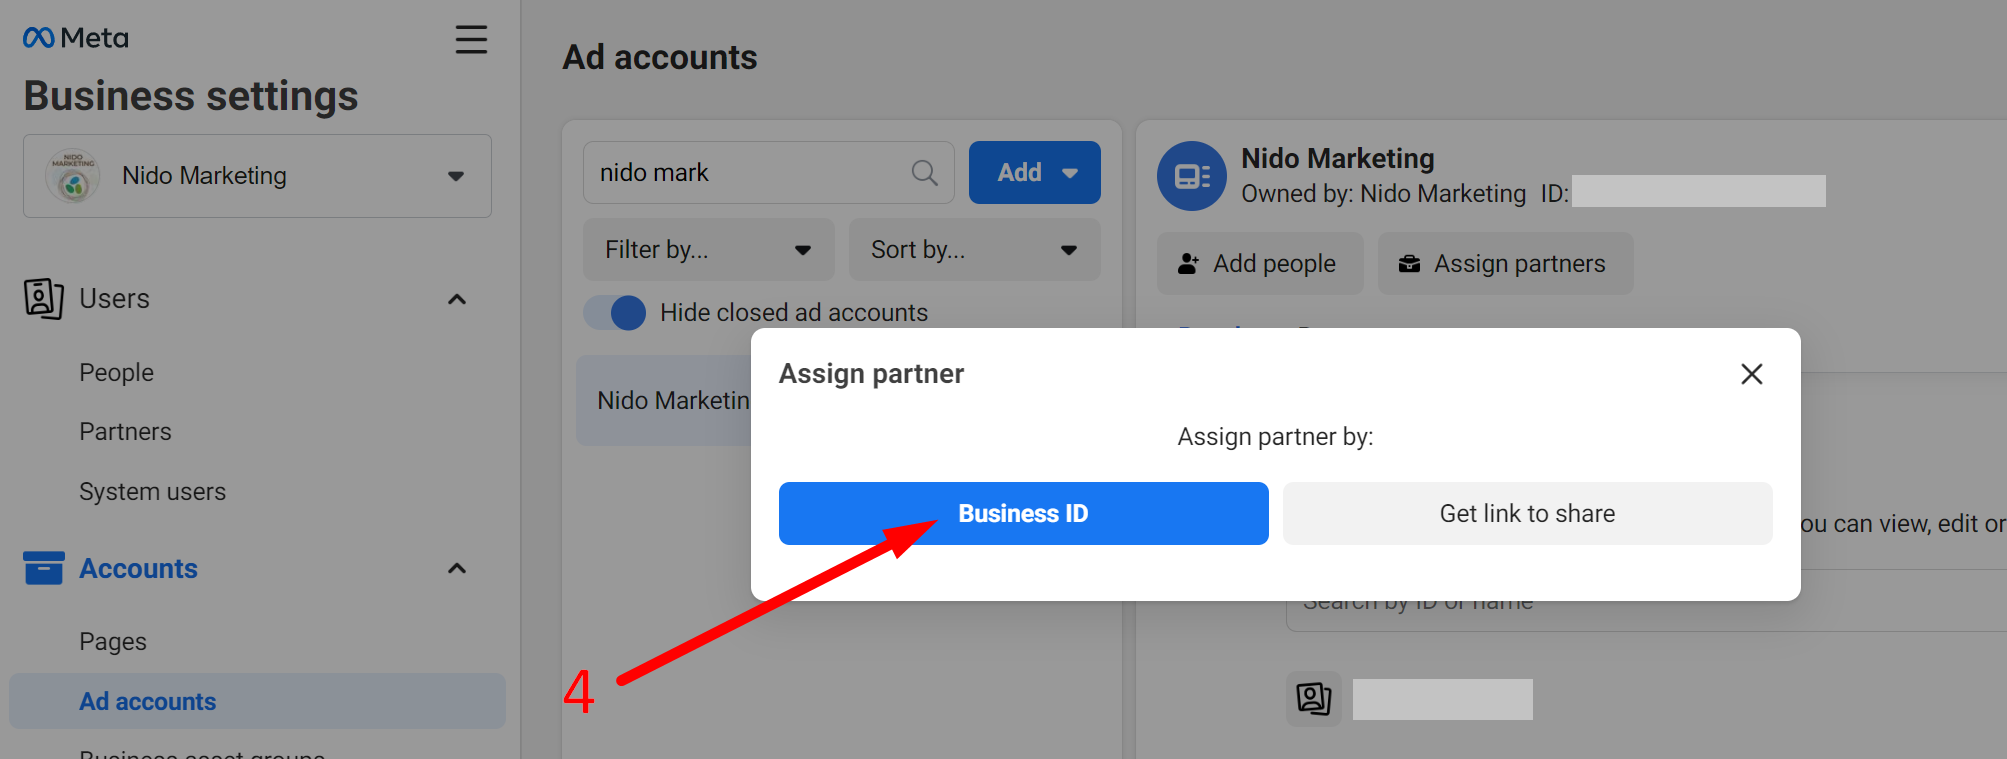
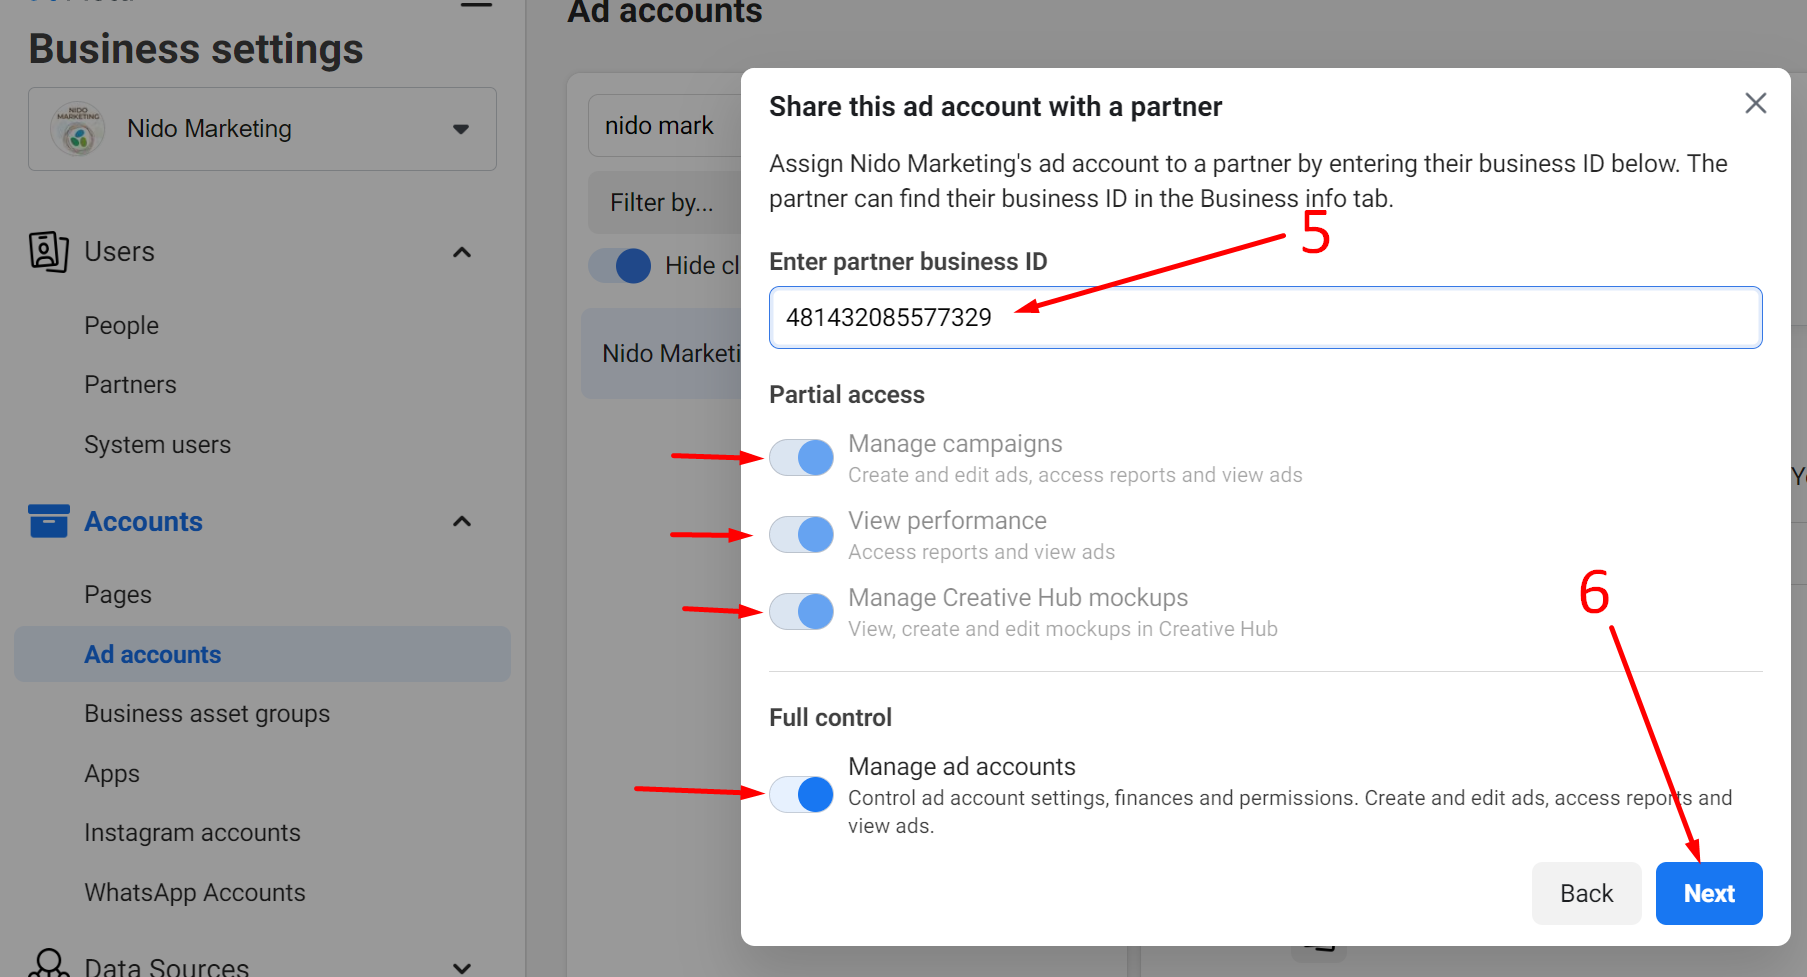
Enter the following Business ID into the “Enter Partner's Business ID" field:
481432085577329
Please select the role level of "Ad Account Admin" and make sure that "Full Control" is enabled. Then click “Next”.
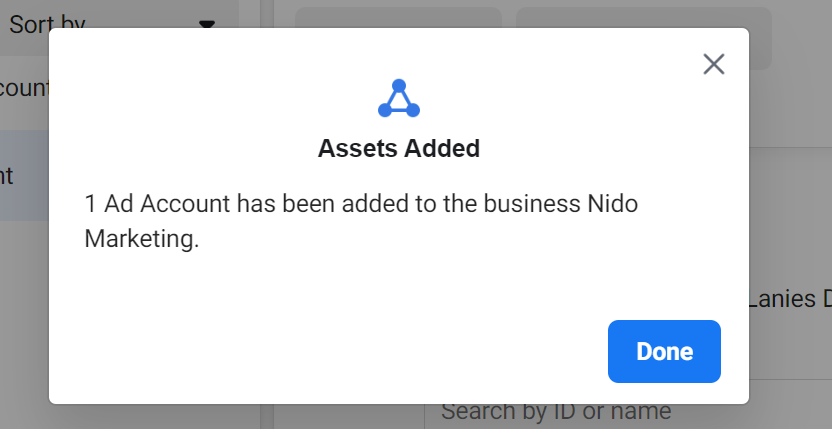
Congratulations! You have added us to your Facebook Ad Account.
You are almost done.
We’ll also need to be added as a partner to your Facebook Business Page. This is very similar to adding us to your "Ad Account."
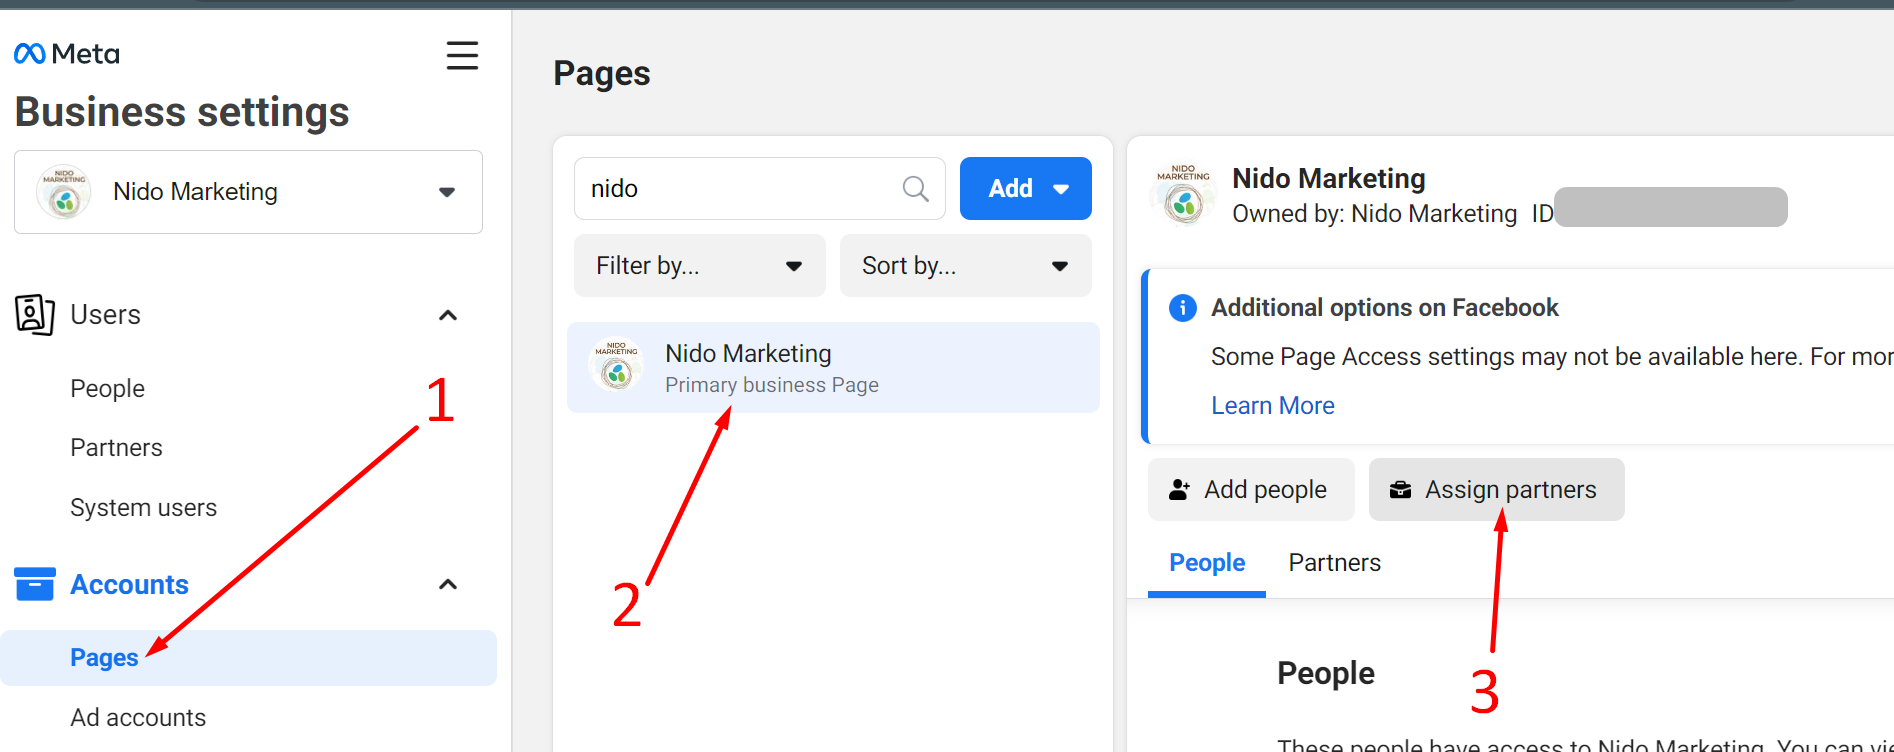
From the same “Business Settings” page, select “Pages” from the vertical list of options on the left and choose the page name that corresponds with your business. On the right-hand side, you will see a button that says “Assign Partners"
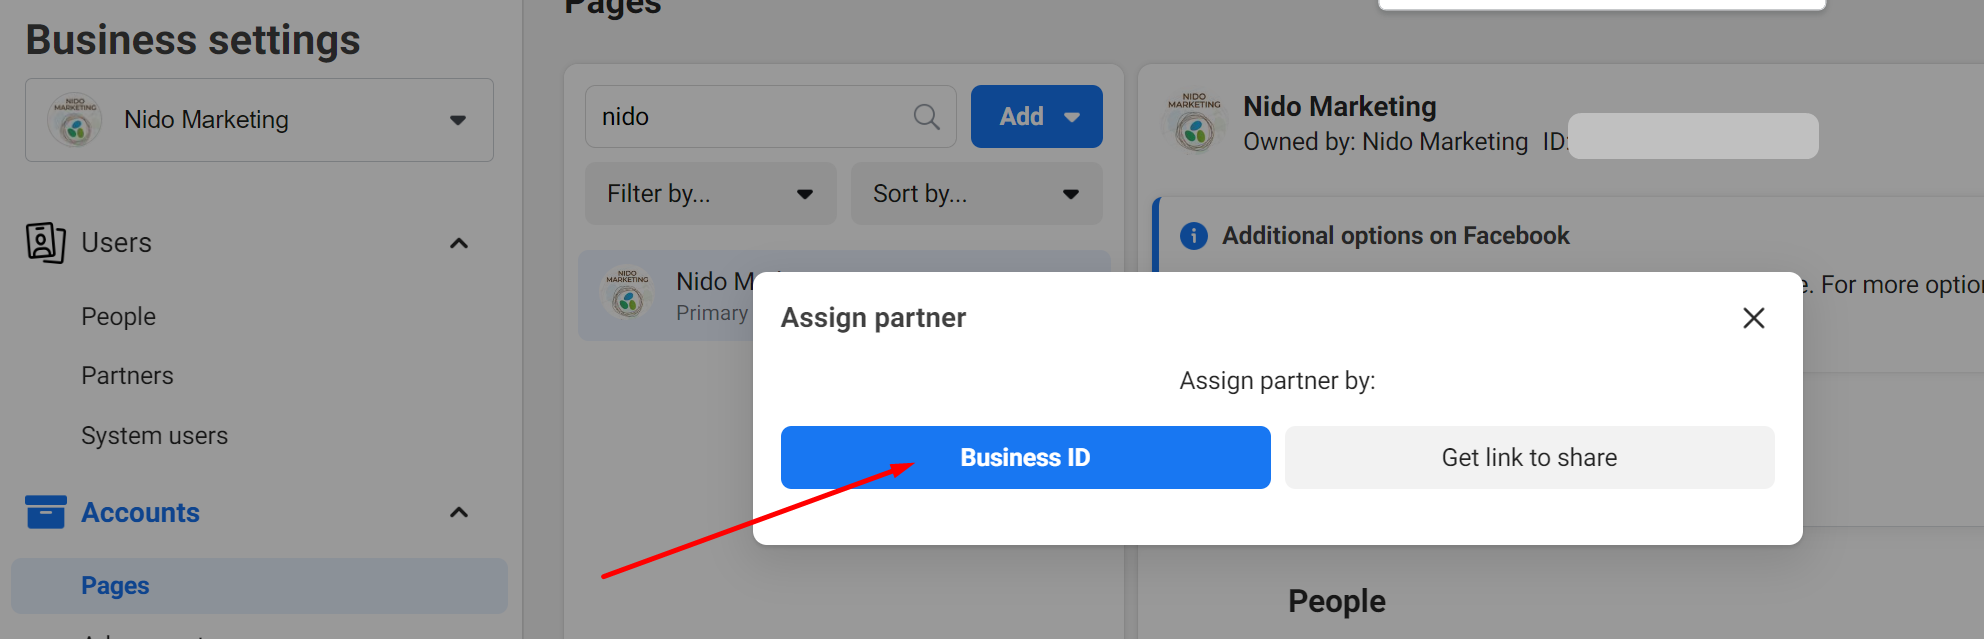
A form should appear with the title: Assign Partner. Please click "Business ID".
Enter the following Business ID into the “Enter Partner's Business ID" field:
481432085577329
Please select the role level of "Page Account Admin" and make sure that "Full Control" is enabled.
Sharing Access to the Facebook Tracking Code with Nido Marketing
Lastly, we’ll also need to be added as a partner to your Facebook Datasource (formerly called Pixel). This will help us set up tracking for your ads. And again this is very similar to the previous two steps.
From the same “Business Settings” page, select the “Data Sources” dropdown and select “Datasets” under it
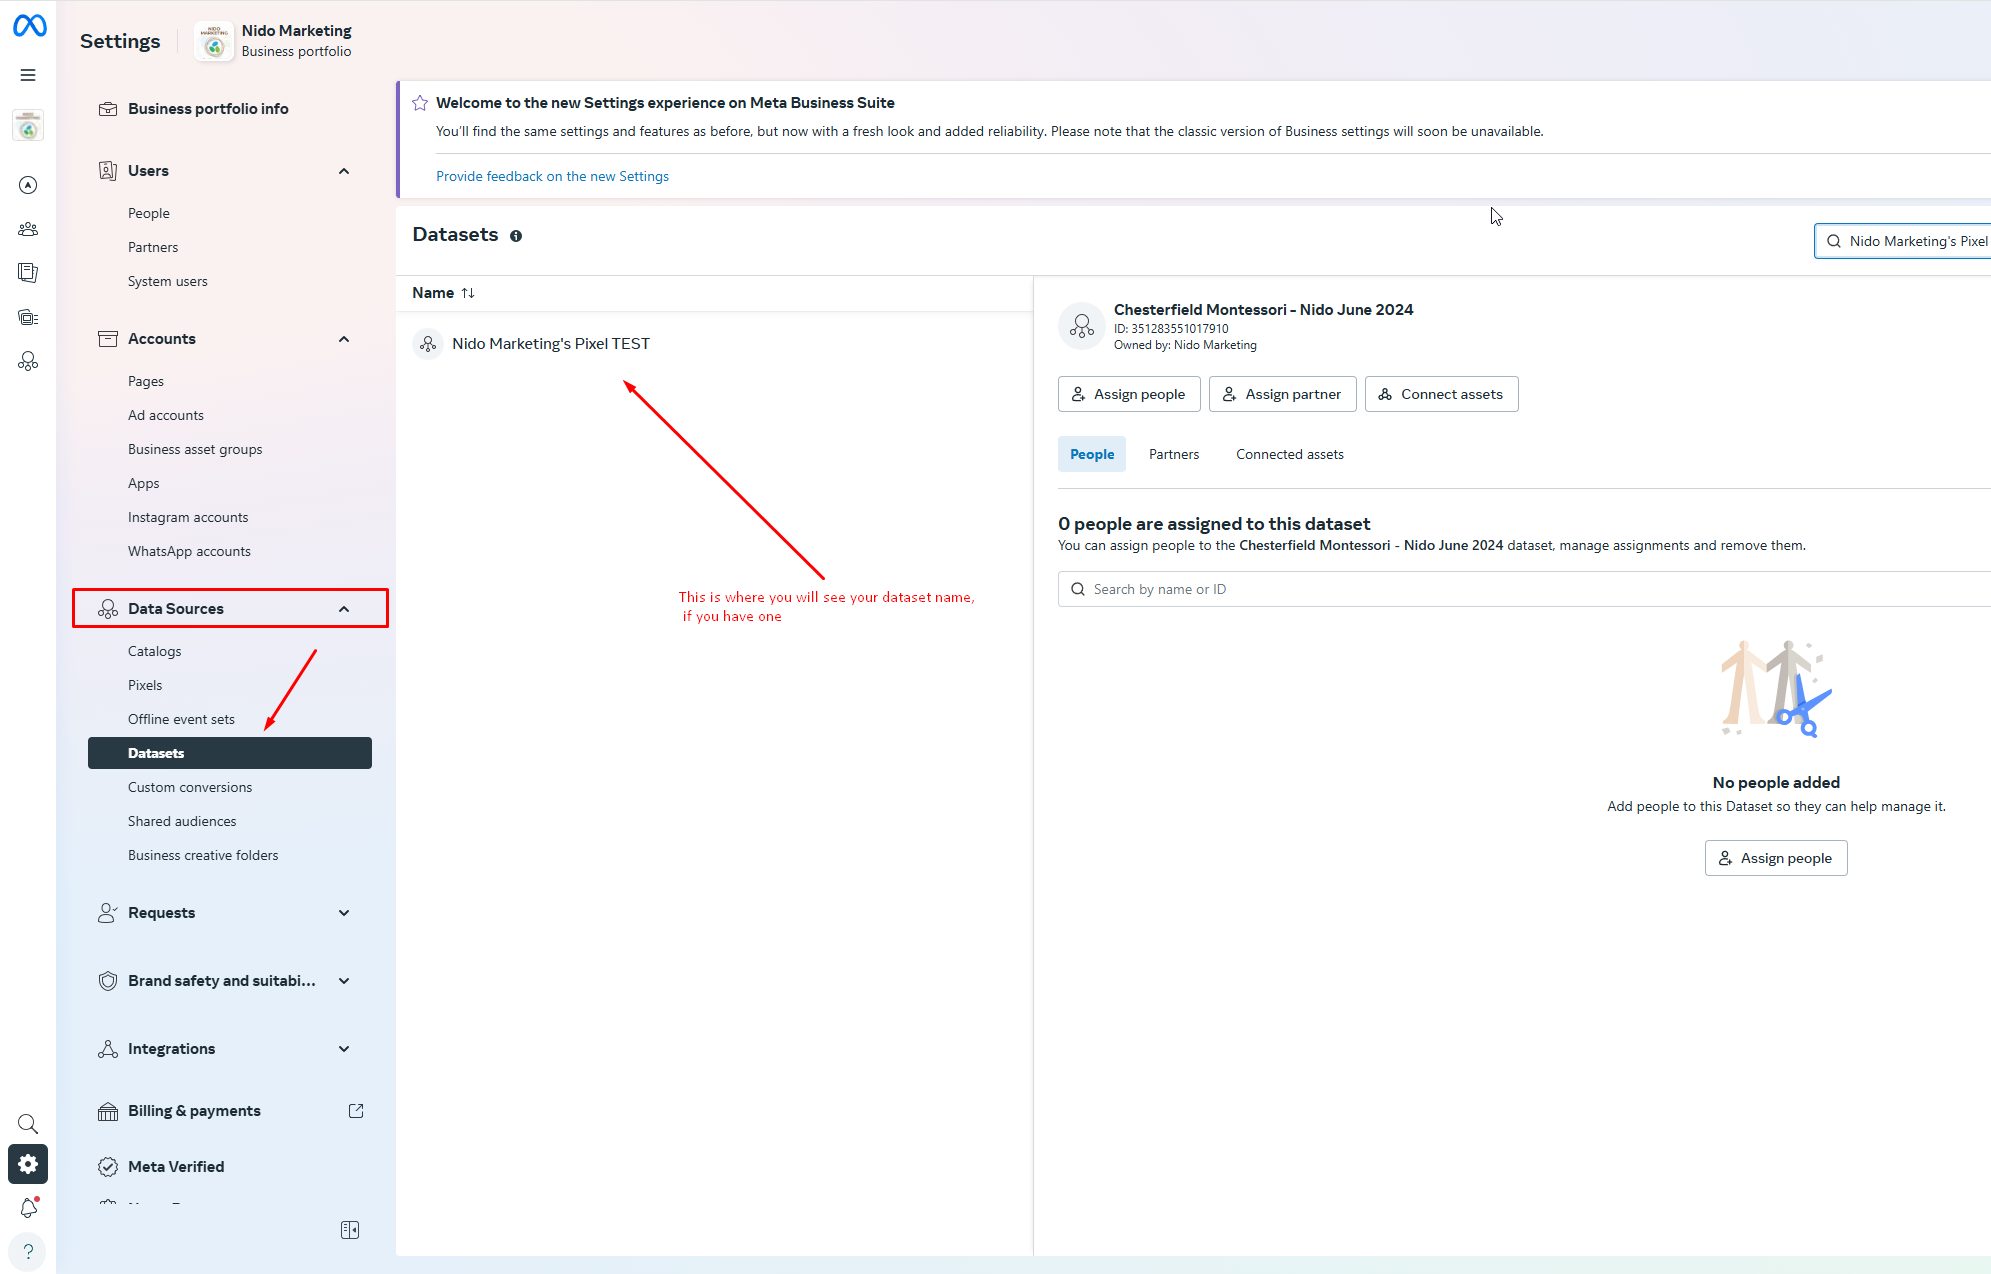
Choose your Dataset name that will show up in the center panel. On the right-hand side, you will see a button that says “Assign Partners".
Similar to the previous steps, once again a form should appear with the title: Assign Partner. Please click "Business ID".
Enter the following Business ID into the “Enter Partner's Business ID" field:481432085577329 And give “Full Control”
Once you completed all of these steps, please make sure to alert your client manager.